


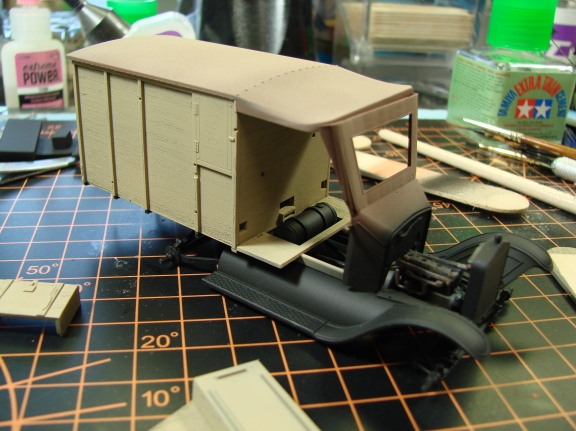
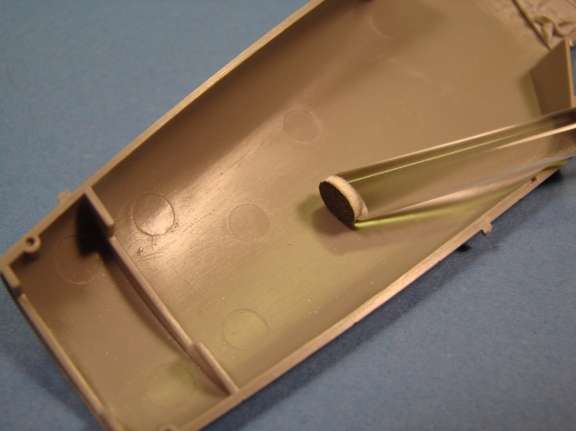
Painting wood grain with oils.
Base coat the parts with Tamiya Buff. When dry Clear coat them.
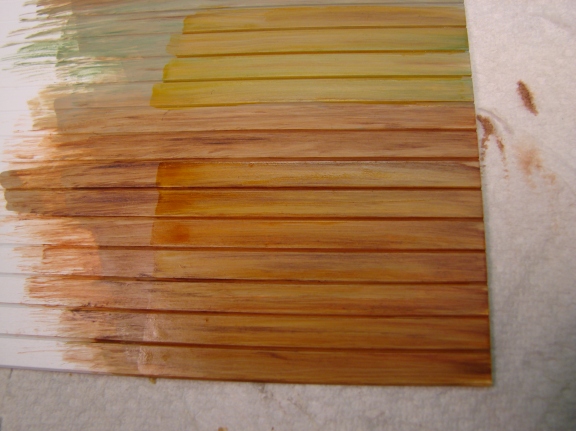
Using dark red, dark brown, yellow and brown black oil paints make dots.
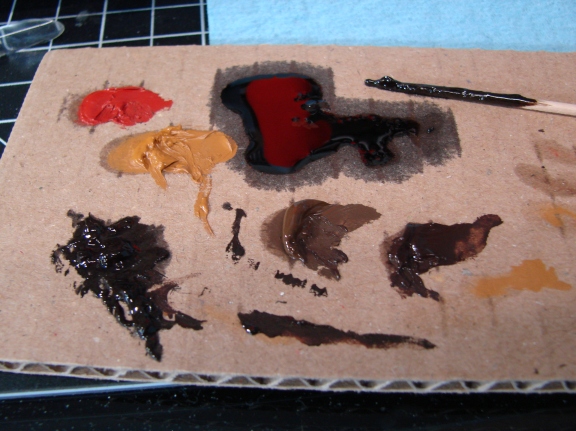
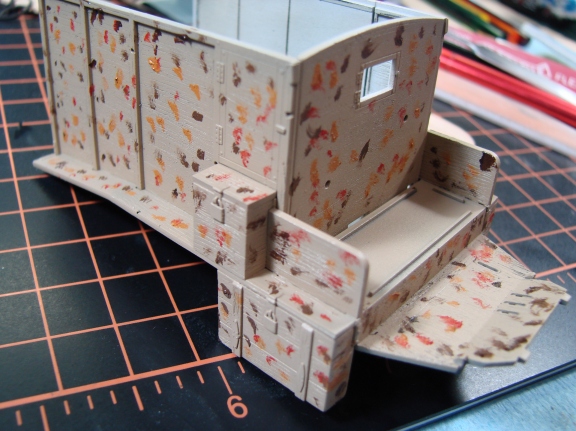
Using wite brush moist with oderless turpintine brush back and forth.
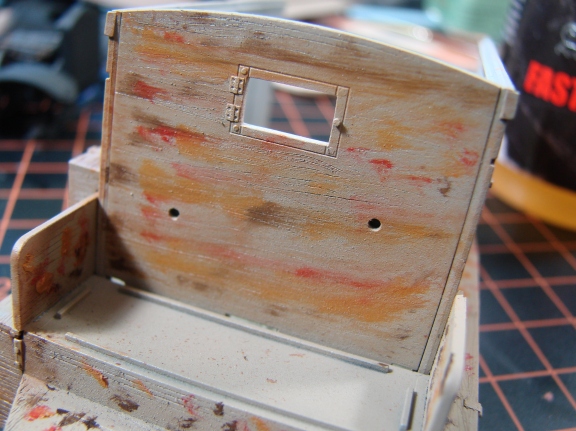
Blend for wood tone.
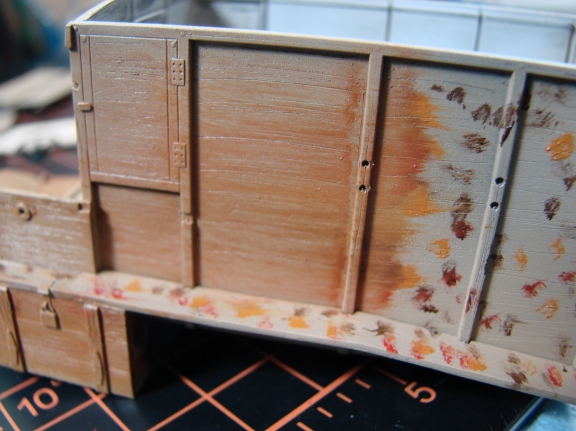
Finished wood now seal when dry.
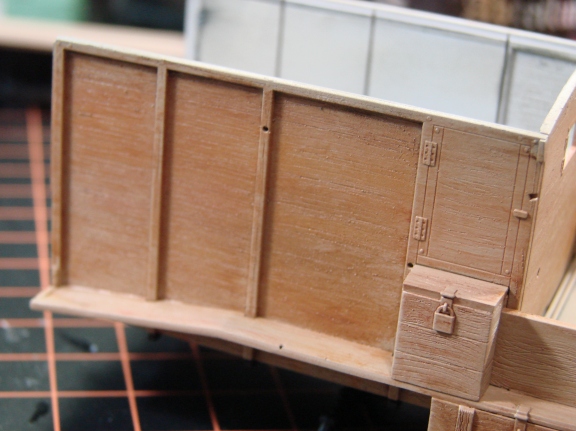
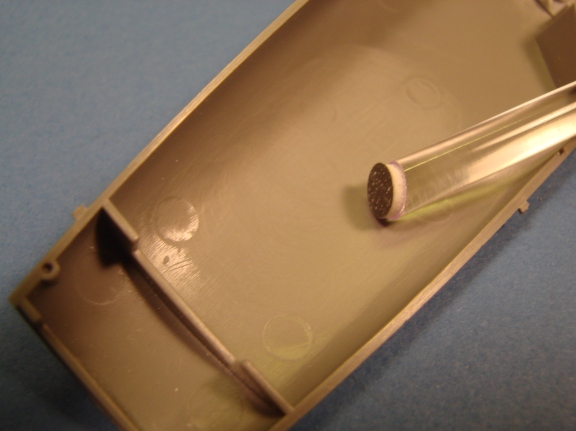
When dry lightly spray cheap hair spray on parts and let dry. Overcoat with final color then scrub paint off with water and a brush.
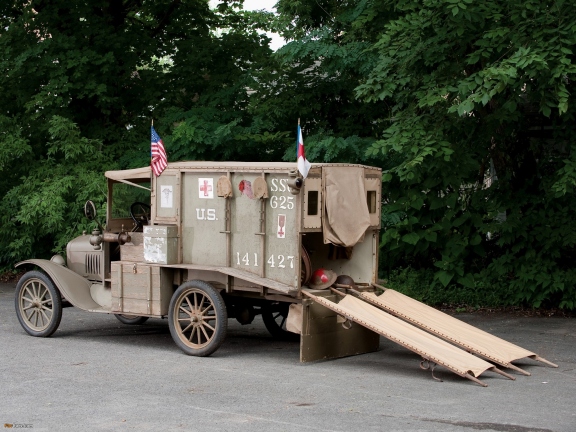
It looks ugly but then so is the real one here. More to come.
How do you like my new wood panel floor?
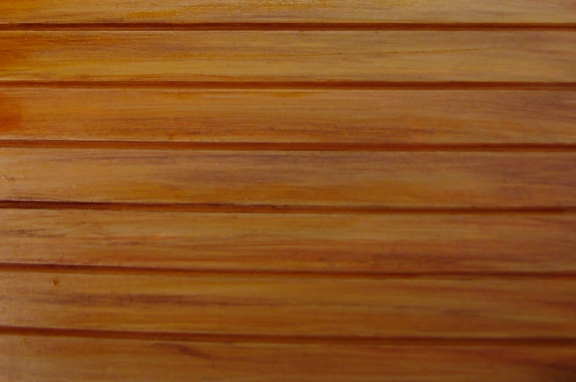
Ha ah fooled you! It is just paint on plastic.
The demo on how to do this coming soon so stay tuned.
Extra! Extra! Read all about it!
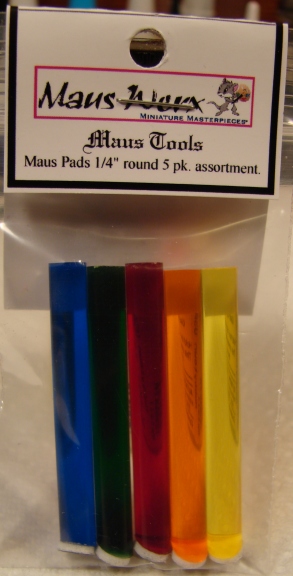
Knock out pin killer revealed!
Yes the new and improved Maus Pads are great for
sanding out those nasty knock out pin marks
the manufacturers leave behind.
Mounted on a soft foam pad
theses tools will not gouge your work and
polish out the round divots with ease!
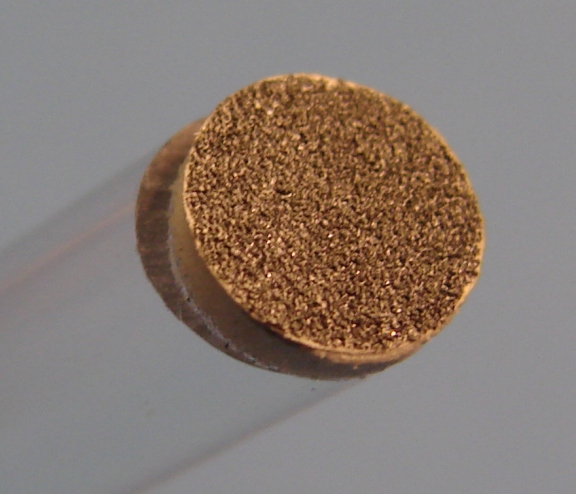
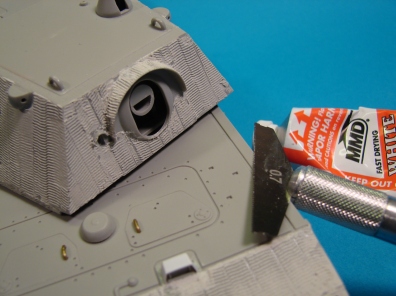
To use gently sand in small circles around the knock out pin with the 220 grit.
The foam pad will do most the work so don't push to hard. Then switch to the 330 grit and
wet with water and repeat the small circles. Continue on to the 400 then 600 then 1500 grit,
all wet sanding with light pressure. Clean the pad with a soft toothbrush and water.
See the mark in the middle?
Now you don't! It is that simple!
Use the teardrop shape set for tight spots and corners.
Sand wash
Here is a easy way to make your model look like it went through a sand storm.
Using a empty Tamiya acrylic jar put in your favorite tan color pigment about 1/3rd full.
Then add 2/3rds Tamiya acrylic thinner. Stir the mix and using a wide brush apply the "sand"
to the model as you would a wash and let dry. If you want less sand wait for the pigment to
start to settle and take the brush load from the top layer of the mix. That's it!
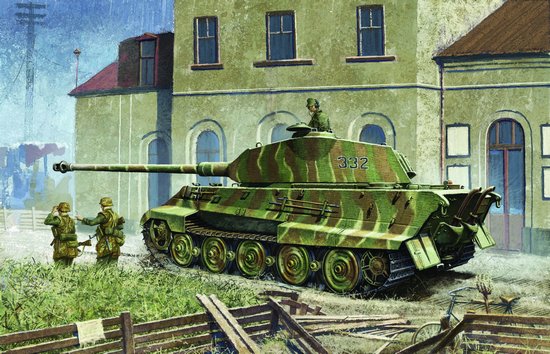
Zimmerit shoot out.
By Dekker Zimmerman
I recently got into 1/35th German WWII armor and quickly found out that many were
coated in a material called zimmerit. This was a paste that was applied to tanks and armor
to prevent magnetic mines from sticking to the hull. The paste was a mix of materials that
when mixed resembled concrete. It was spread with a trowel in various patterns to keep
the weight down. This ranged from horizontal lines to a "waffel" pattern.
I soon realized that most kits did not have this feature molded on. Model companies had
problems molding the texture to look hand applied. The one option was to apply this on
models by hand. Dragon models is releasing models with a new technology called slide
molding and can replicate zimmerit fairly well but only have a few kits out.
(see the kit review page for details on one)
I decided to take the plunge and try my hand at modeling this texture. There are many
ways to do this including putty, epoxy putty, pre-made resin sheets and photo etch.
Below is a brief description on each
1. Putty- Many forms and dry times (discussed below)
2. Epoxy putty- A two part thick gum like material that has a long dry time but is thick
when applied and needs to be textured by a screwdriver blade or doe roller.
3. Pre-made resin sheets- These are very thin flexible resin sheets with molded in texture
and cut to he shapes in the model. These are a fast way to apply zimmerit but you will
still need to know how to use the putty method to fill in gaps.
4. Photo etch- These are thin metal sheets cut to the shape of a models parts. They are
hard to apply on complex surfaces so you will still need to know how to use putty.
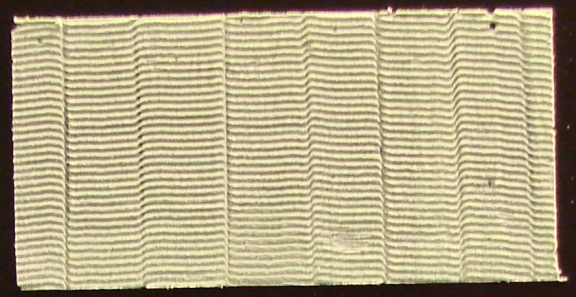
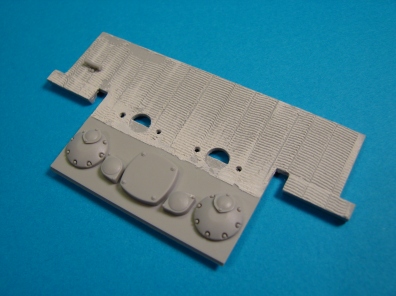
I experimented with six different types of putty raked with the Tamiya brand of
zimmerit tool. This tool is a must if you are simulating the scrape method of zimmerit.
Some putties dried to fast and caused "tearing" and others attacked the plastic to hard.
The six types of putty I tried were:
1. House hold spackle, for wll repairs
2. Tamiya polyester putty
3. Testors white putty
4. Squadron white putty (green was just too gumy)
5. Molak Stuco
6. RPM's Red Bondo
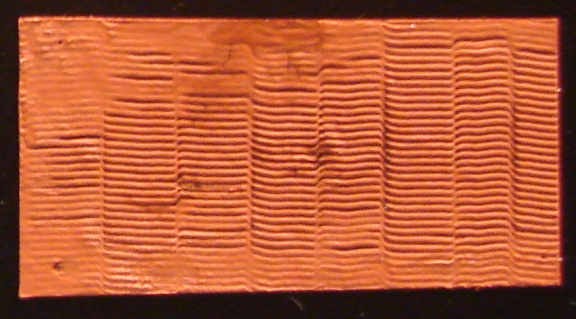
I taped off 1"x2" squares on black Evergreen styrene and spread a glob of each putty on
to the squares the "raked" them with the Tamiya 0.7 tall rake. I raked a 1/4" then slid the
tool down slightly then dragged then up 1/4" ect. to simulate the real pattern on
German armor. The results were as follows:
1. House hold Spackle
This was bought at a hardware shop. It is water soluble and has a problem sticking to
flexible parts. It dries quickly, in a few minutes, it will be to tough to rake and will tear.
It spreads VERY thin and might be a good scale choice for 1/48th armor. No odor.
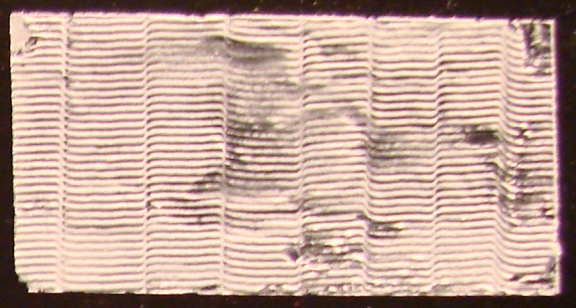
2. Tamiya polyester putty
This putty is VERY toxic and the fumes are horrible. This putty had the longest work
time as you mix 2 parts to make it and spreads smoothly. It had the best performance
while raking but the smell will drive you out of you model room immediately! Too bad.
3. Testors white putty
This putty is by far the cheapest but skins over almost immediately causing tears.
This sometimes looks like zimmerit damage but is hard to control. Low odder.
4. Squadron white putty
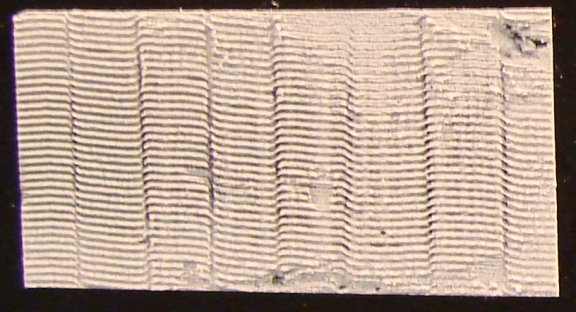
This putty dries quickly and has some tearing. It bites into the plastic well with out
melting it. I found it easy to repair when dry as it sets up strong and will guide the
rake well for touch up. medium odder. This is the best of the 6 in my book.
5. Molak stuco
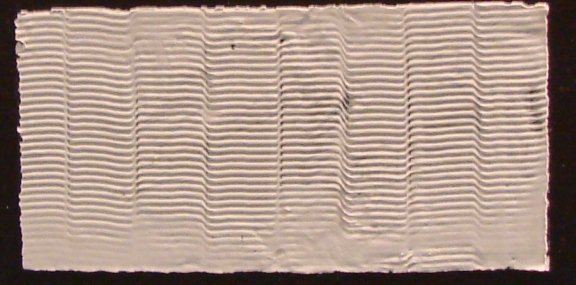
Molak stuco is VERY smooth. and spreads well. The down side is it seemed to blend
together in places. This putty is also hard to find. Low odder.
6. RPM Red Bondo
This is a auto body filler found at auto parts stores and was also sold as Testor Red Putty.
This putty is ideal for filling gaps BUT when I tried to rake it it had immediately attacked
the plastic underneath and the rake scored the softened plastic below. It also blended
together a bit. Not a great choice for zimmerit but great for seams.
The first choice is buy a Dragon model with molded zimmerit
The second choice is to buy the thin resin sheets that are pre-molded
The third choice is using putty.
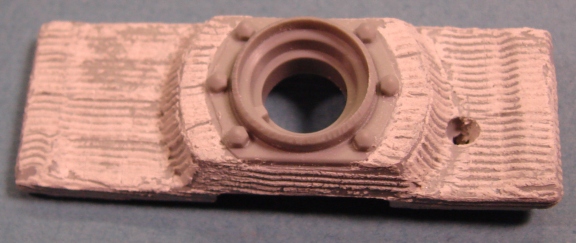
My conclusion was that for my style of modeling the squadron white putty worked the
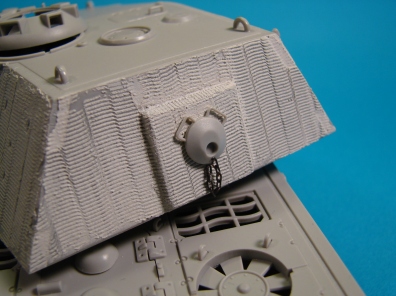
best It only needed a bit more dry time. Here is a photo if it applied to a Tiger I gun mantlet.
I hope this helps in you modeling.
For more info on zimmerit visit www.panzerworld.net/zimmerit
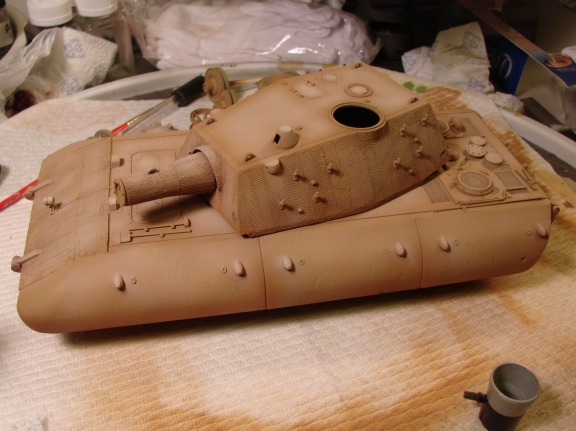
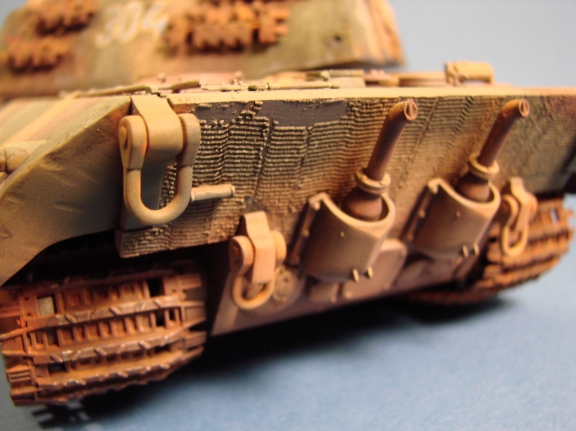
Trumpeter E100 build up part 1.
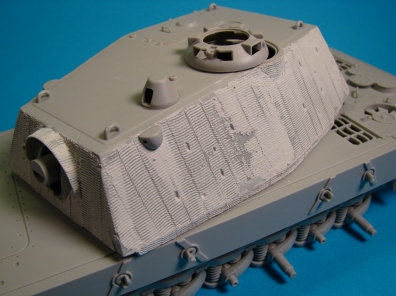
Well I started the build of the Trumpeter E-100 and with the low parts count it has been
a quick build. I decided to add zimmerit to the model to add some interest and practice
on application. Who says this is wrong as the real tank only had the chassis built.
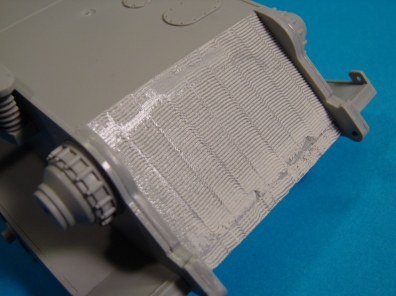
I used the Tamiya zimmerit applicator tool and Squadron putty. The putty was smoothed
on with a Squadron putty knife and quickly raked out. The putty started to dry and skin
over as I raked but this added to the look of the zimmerit as it had chips in it on the real
tanks. Once the area dried a few minutes I could patch up any flaws and clean out the
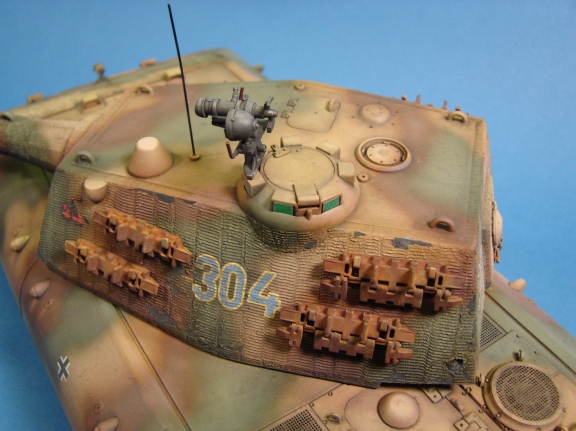
mounting holes. I added a short length of real chain on the rear of the turrets escape hatch.
I rebuilt the periscope covers on the front as the kits were not fitting.
More fun to come in part 2.
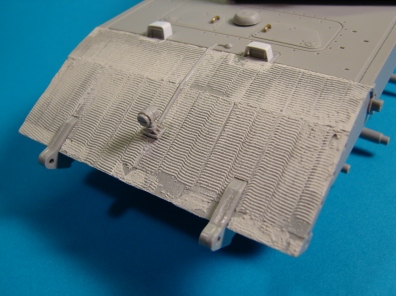
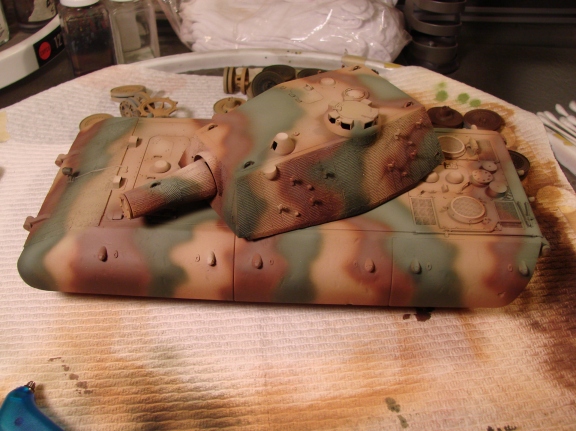
Trumpeter E-100 Build part 2, paint.
After giving the whole tank a primer coat I used Tamiya XF-60 dark yellow as a base coat
and then added a bit of XF-64 red brown for a shadow color, highly thinned. I then added
white to make a highlight and added this to all the topside forms.
I thin proceeded with XF-67 nato green and again added dark shadows and then lighter
highlights. Next was the XF-64 red brown and more shadow and hi-light. Below is the
progress. Notice the zimmerit texture is almost lost in the paint just like it should be.
This will be brought back during the wash phase. More soon!
11/18/08
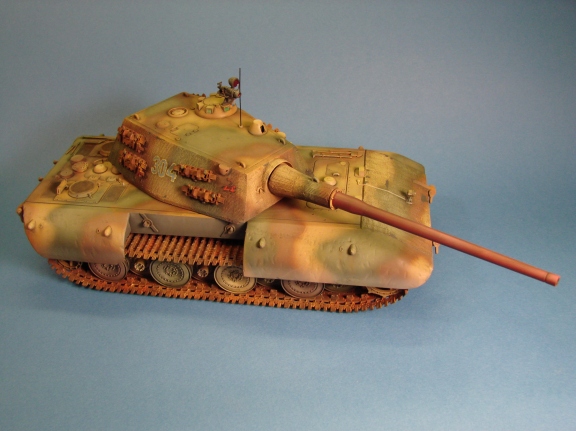
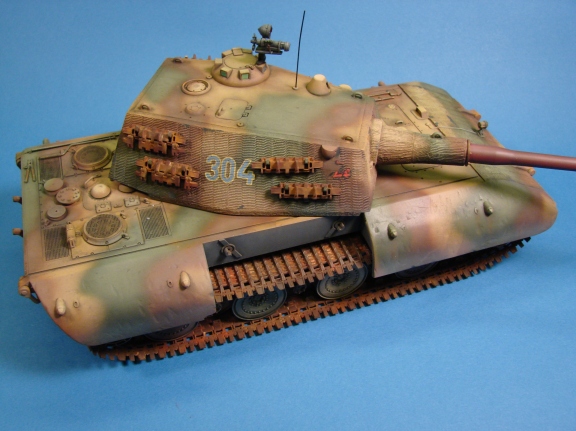
It is finished!
I finished the E-100 just in time for the IPMS Phoenix show where it took a first.
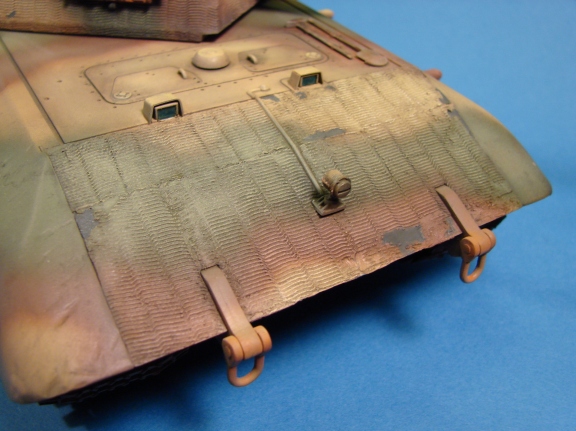
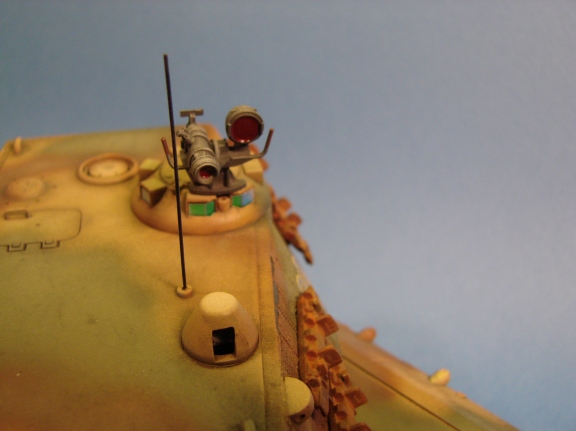
Here are the final build photos.
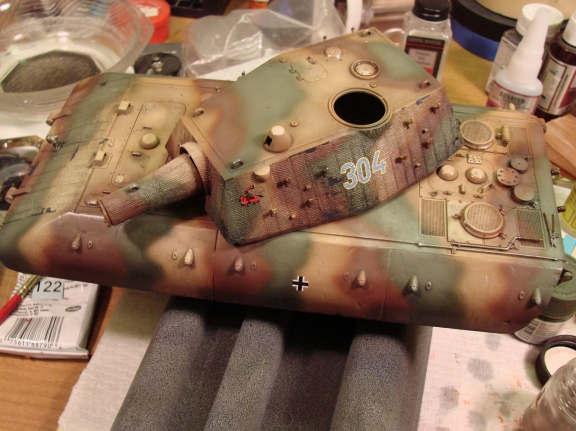
Here is the tank with a coat of Future gloss and the decals applied. I used some
decals from the DML 505th Tiger 1 kit.
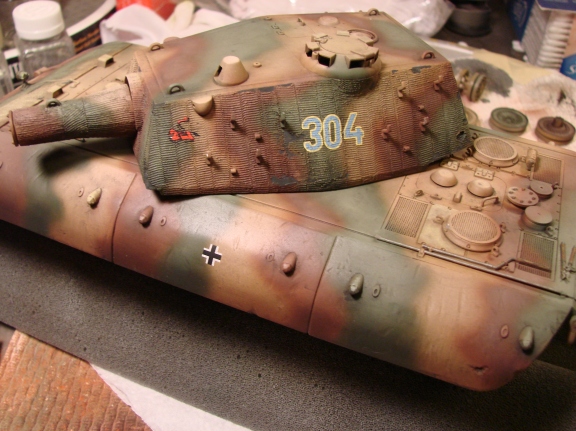
Here I applied a enamel flat black wash and then when dry shot it with dull coat.
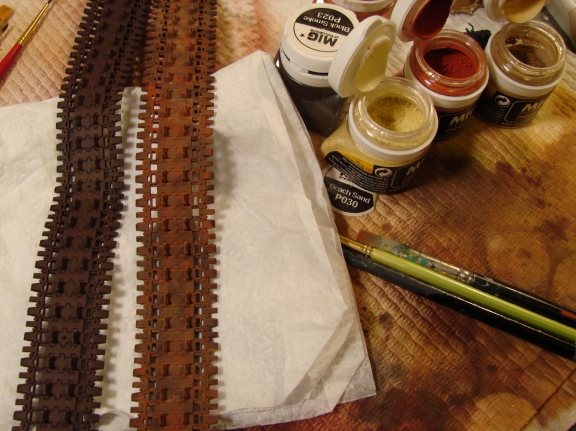
This is the track, painted dk. brown on the left and weathered with MIG pigments
on the right. I used 3 colors and recoment if you use these be VERY carefull not to
get any on the rug as it will not come out easy! I applied them dry.

Here is the track weathered with the left one dry brushed with dull steel.
After a dry brush and some pastel colors like dk. gray in the pannels this is the result.

Before
and after.
And the reward at the 2008 Model Zona show in Phoenix 2008.
